Clamps for Fusor Project
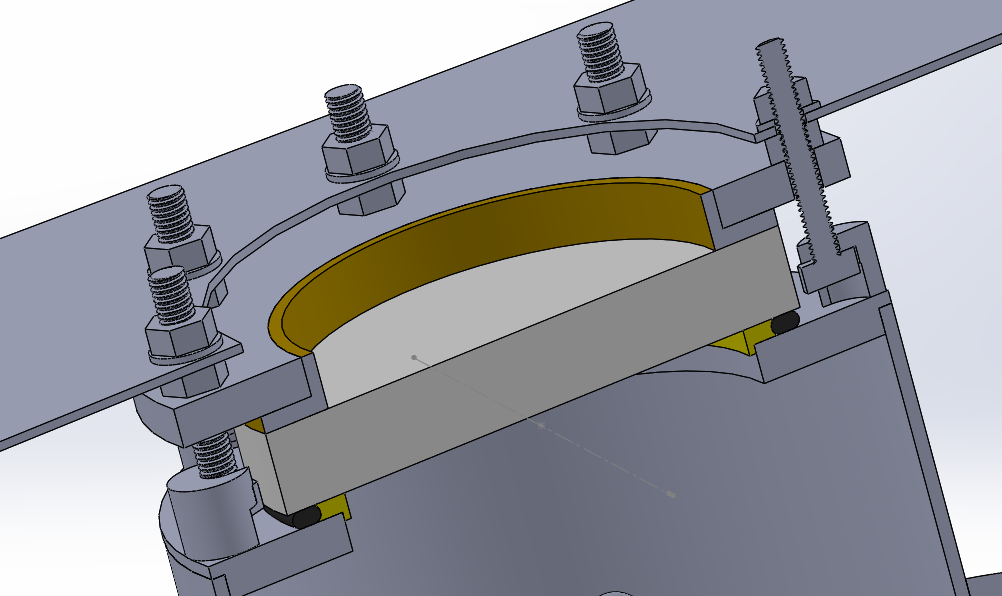
The nuclear fusor I am building / built requires a turbomolecular pump and a flange to be bolted to it's main body. In reality the setup is a vacuum vessel built from stainless and generally due to its prototype nature it will be assembled many times. As things are used they begin to wear down, the special thing about these clamps is that the bolts can easily be replaced within them. It I were to directly weld bolts to the vessel then it would create a massive headache when they need replacing.
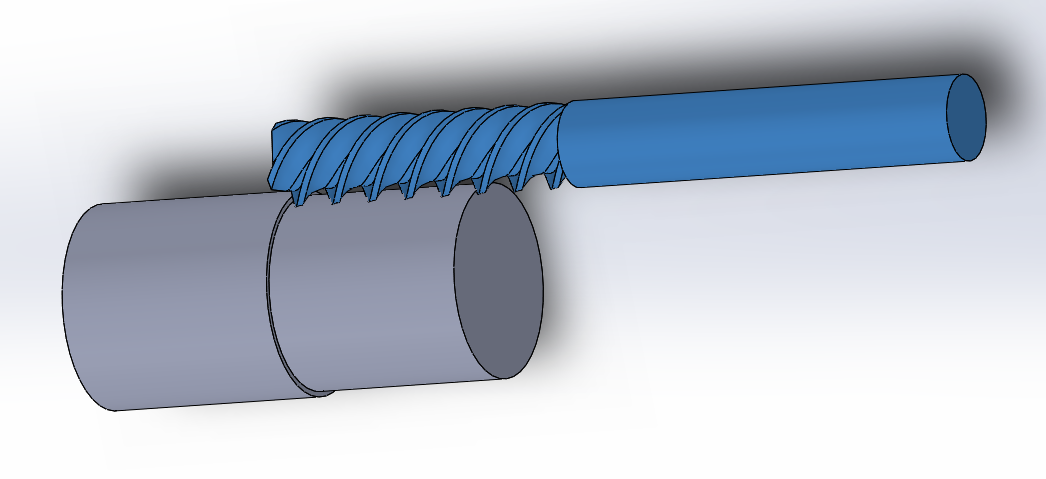
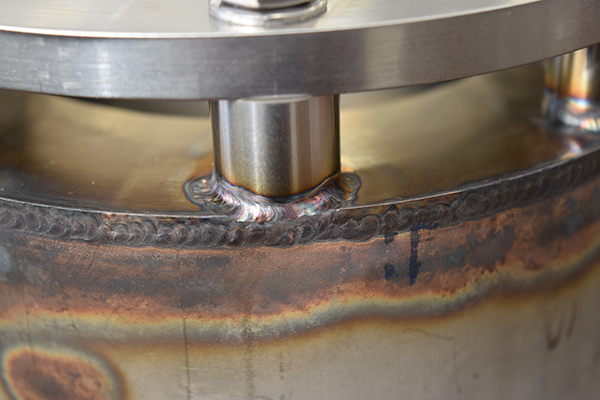
Here below shows one location where these clamps will be used on the vessel.
Design
The first step is to design the actual part, of course I have already done so as in the above. If this was not from an assembly and was simply from a drawing or something I had made up in my head it is always worth making a CAD file. The reason for doing so is sometimes it gives a better idea of how to machine the part. The main reason is that in most cases the programmer (me) will need some coordinates, especially if there are radii involved or milling.
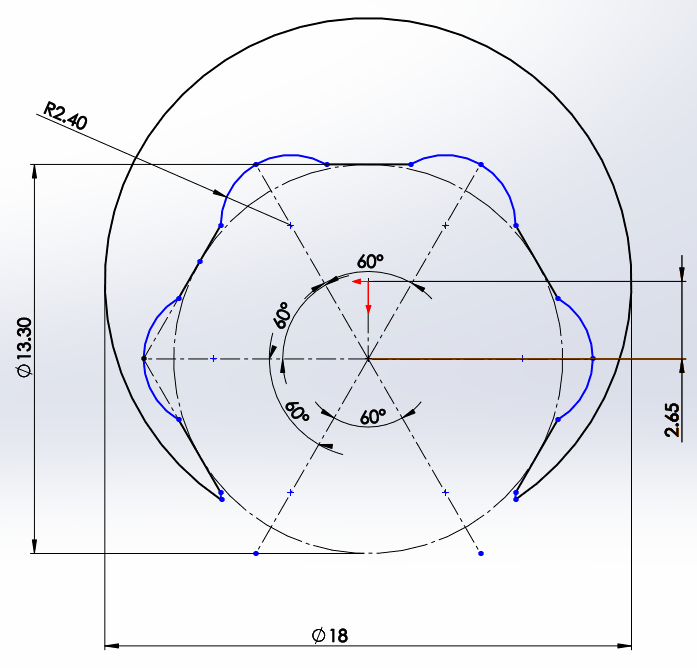
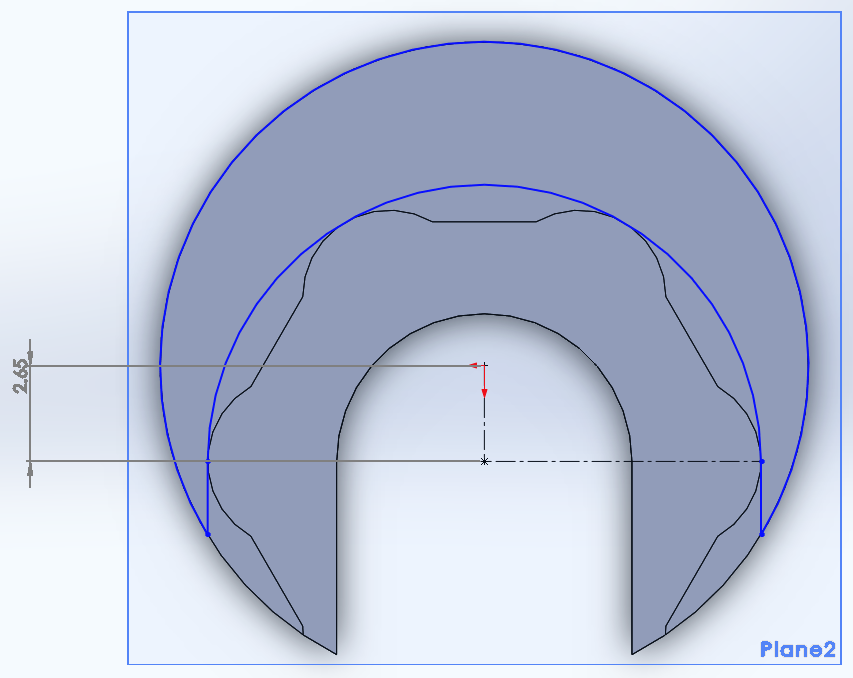
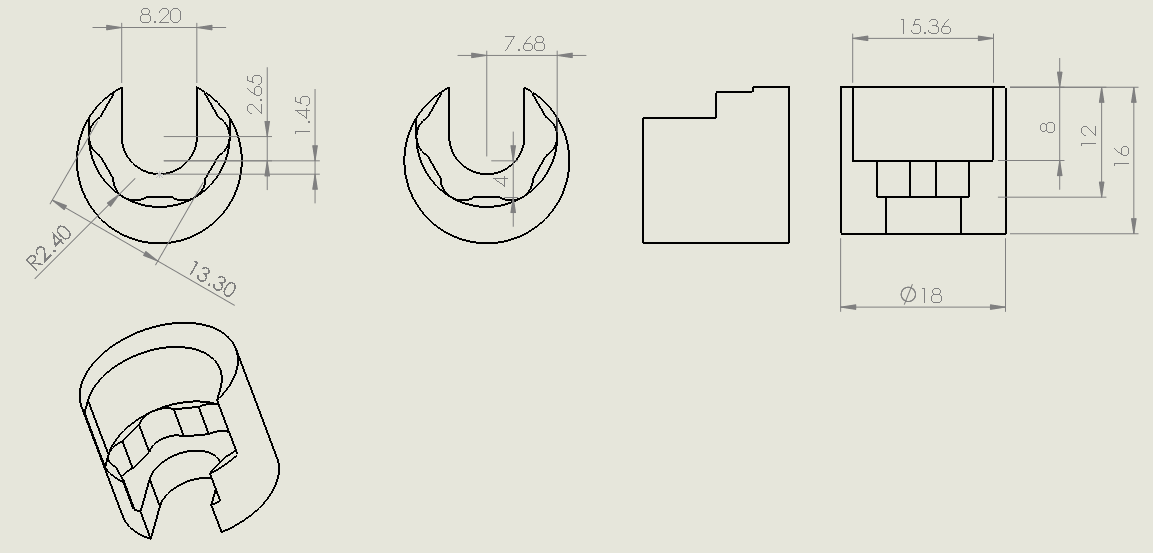
I made an outline of the bolt head, the corners of the bolt head must be taken into consideration. A sharp corner would be impossible with a milling cutter unless broaching was to be chosen. Even a small radius would be difficult due to the weakness of the cutter, this also adds time as it will take shallower cuts. I went with an imperial cutter, 3/16" which is 4.76mm. You can also see that in the sketch many of the dimensions are missing, this is simply the software removing them when I trim lines. I also offset the whole thing as I will be welding it and this keeps an extra amount of material to one side for welding.
The profile extruded.

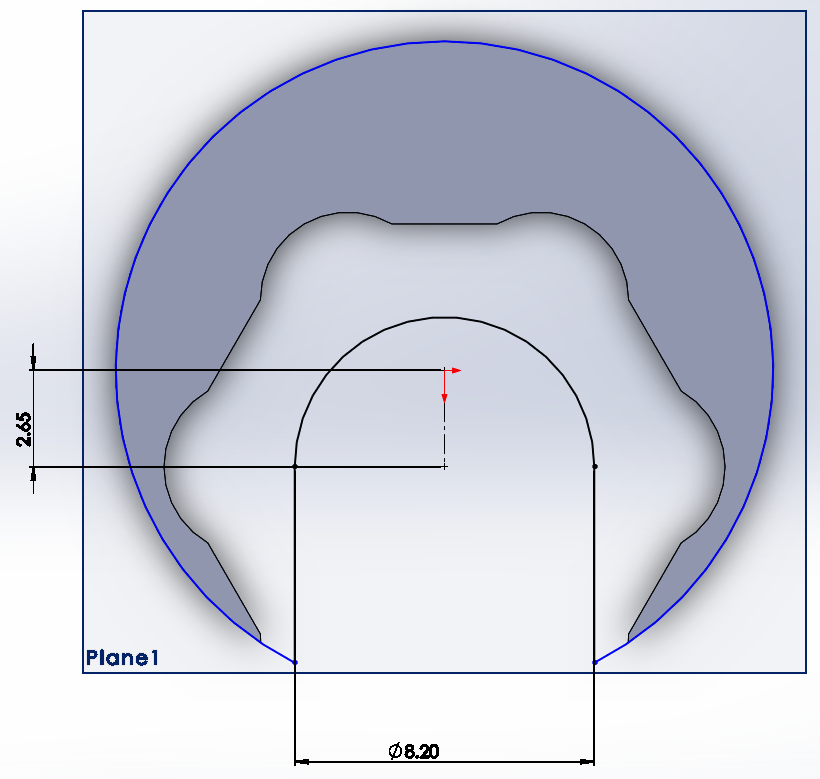
I next drew a sketch of how the bolt shaft will be inserted into the holder, a width of 8.2mm for an 8mm bolt.
Then extruded.
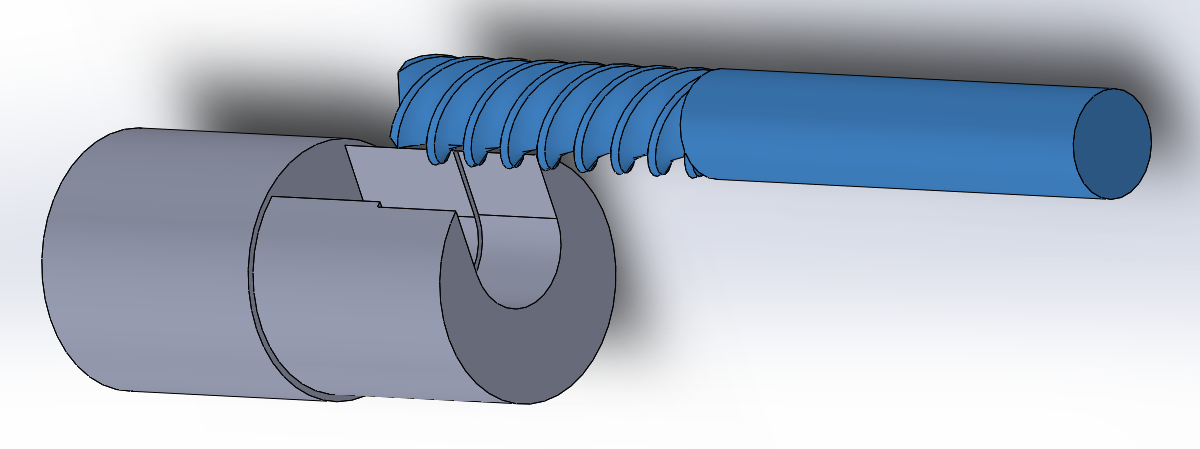
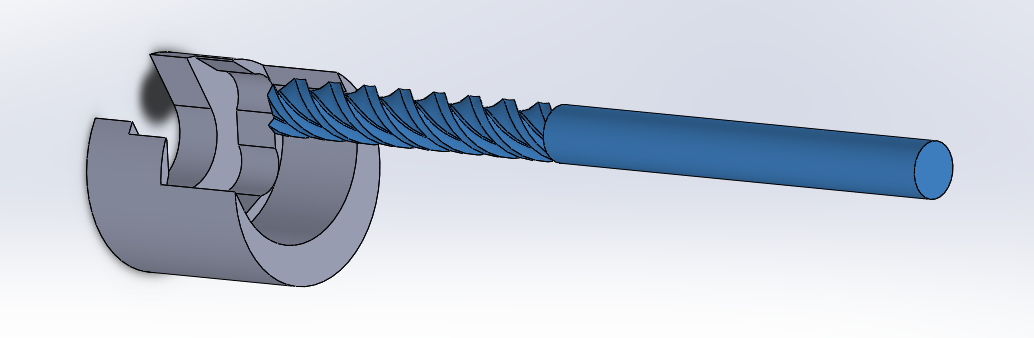
This is the final sketch of the path that allows the head of the bolt to be inserted.
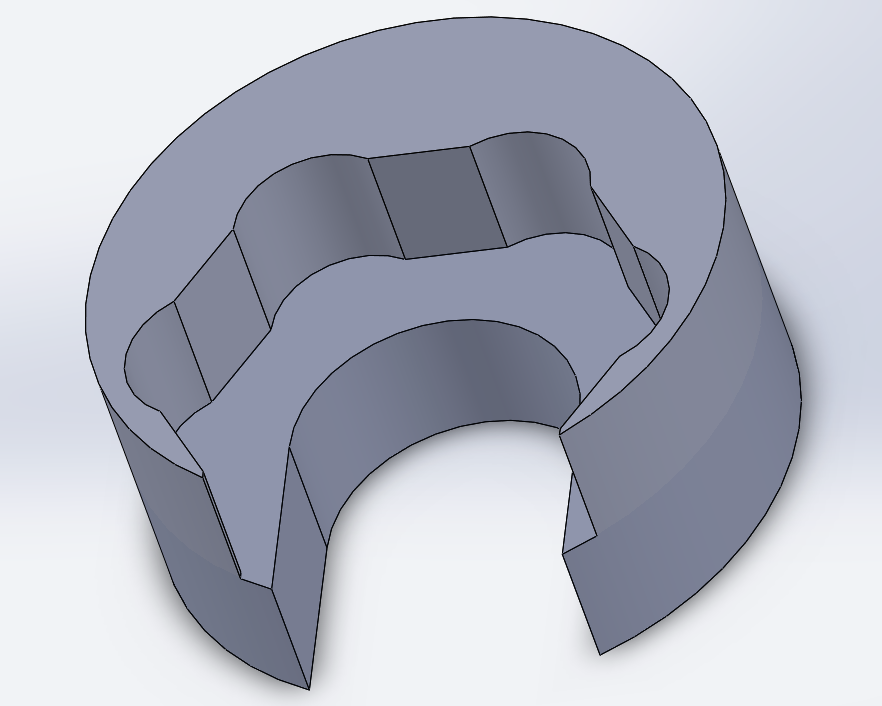
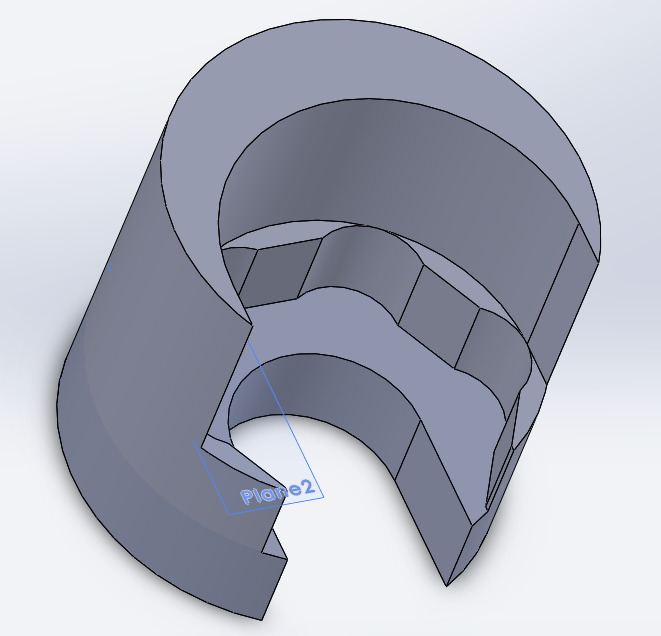
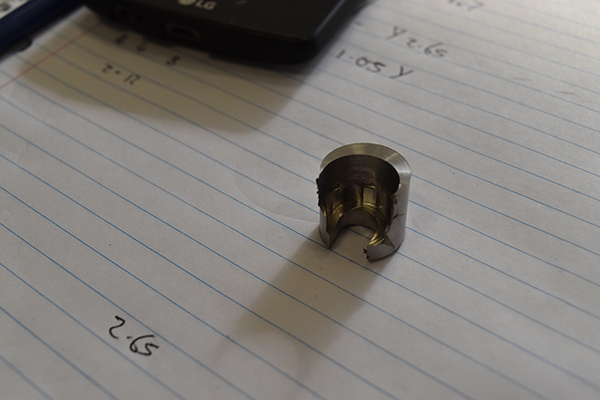
The part is now finished. The top of this will be welded, here you can see that if I had not offset the head then it would have been very thin to weld, probably impossible.
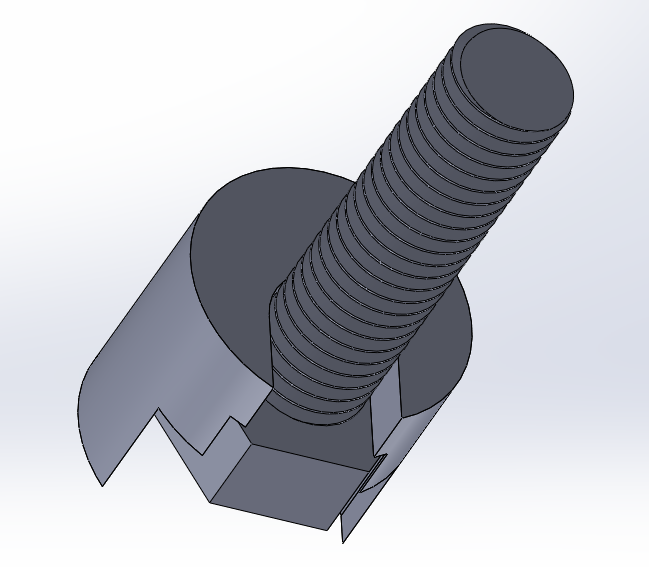
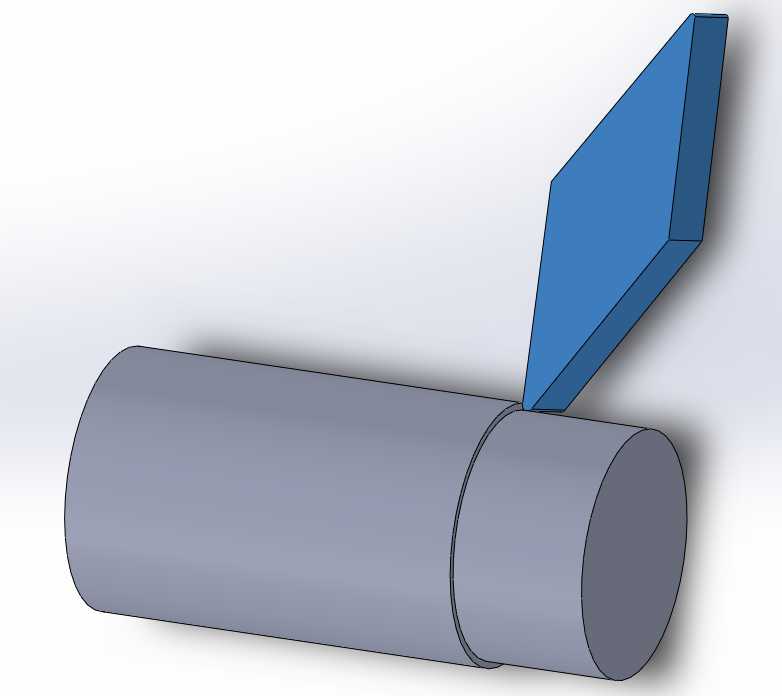
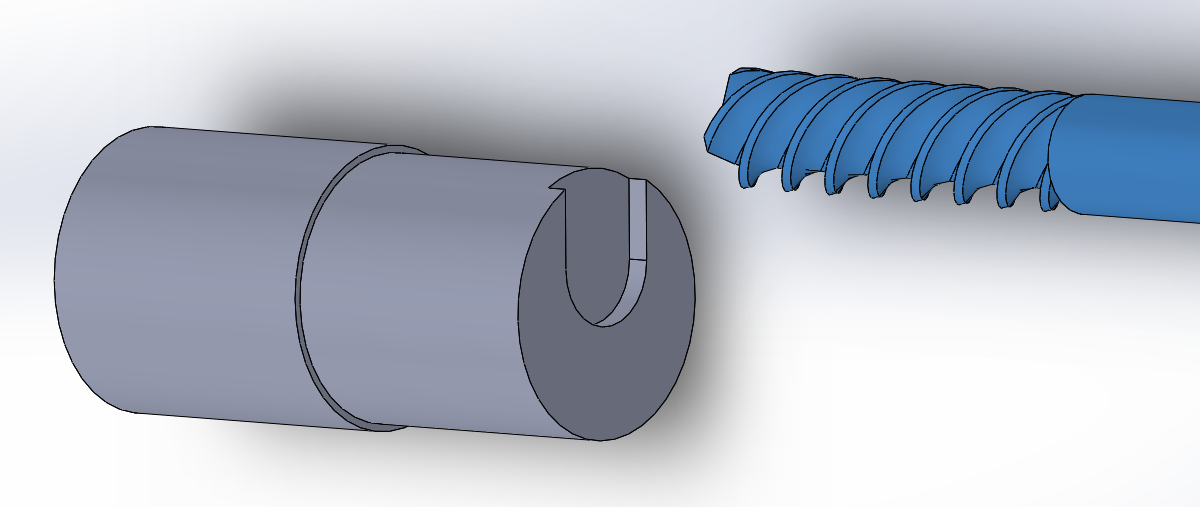
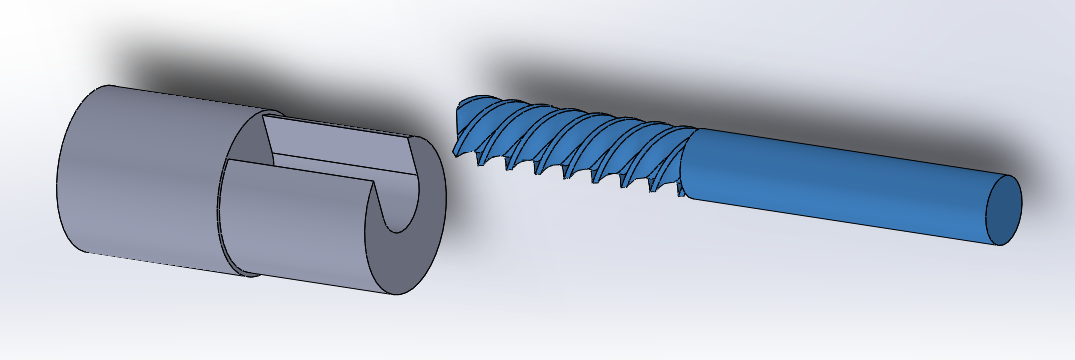
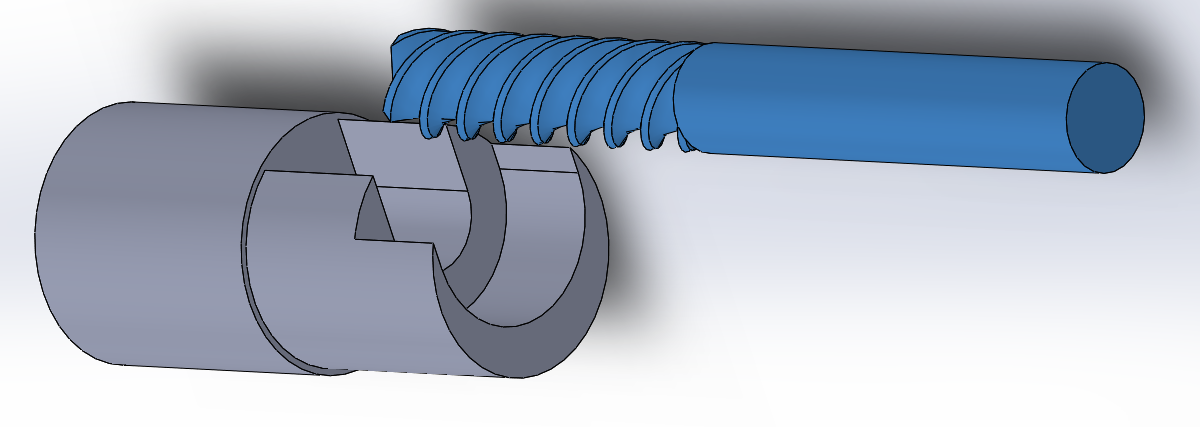
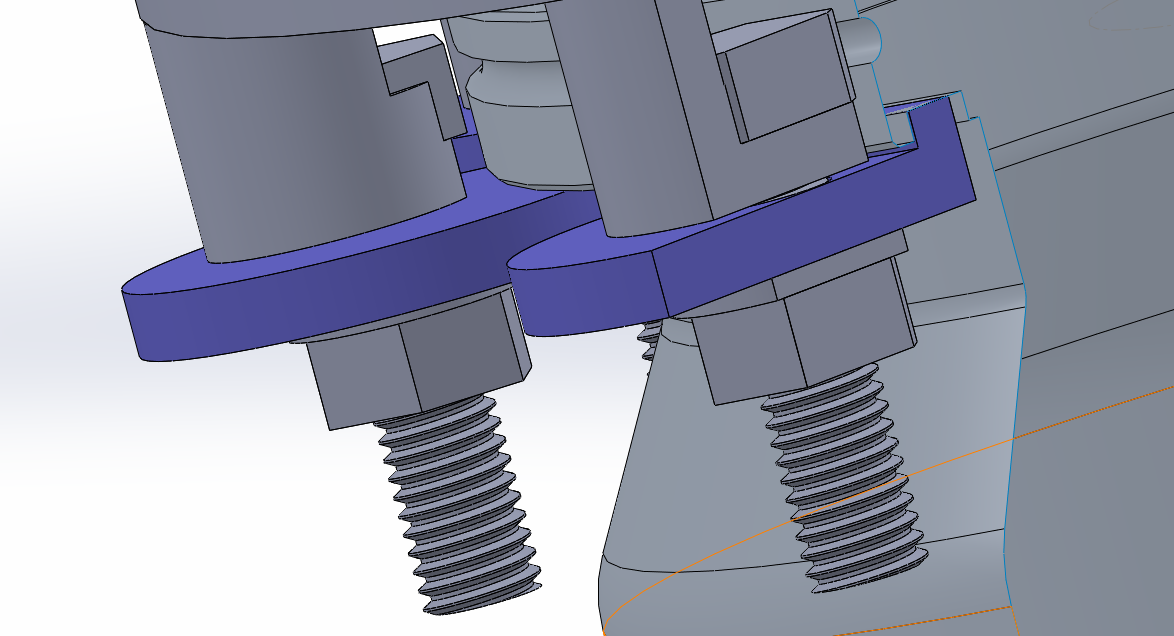
Here is how it works.
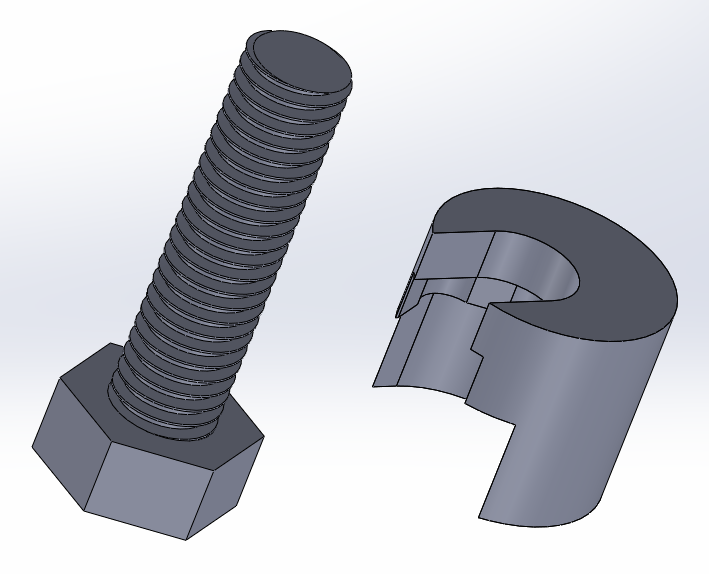
There is room for the bolt to be inserted.

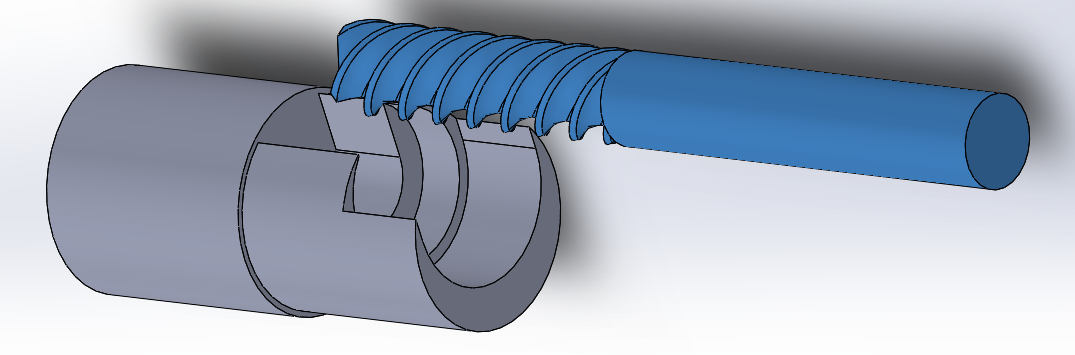
When lifted the bolt head locks in place.
For the person machining this part (me) there should be a detailed drawing. The problem with the machine I'm using is that it will not use tool compensation on this type of milling. To mill the hex profile I had to create a separate drawing for the milling path, not shown here.
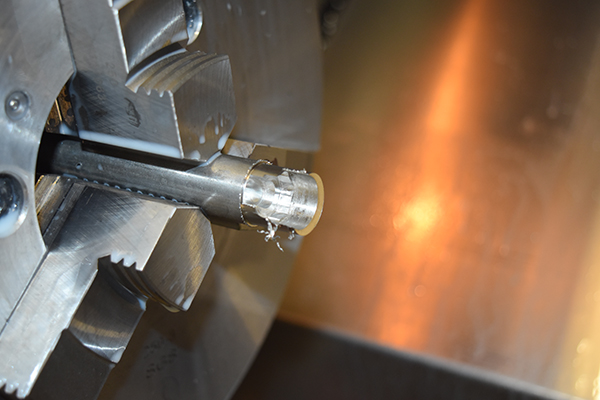
Machining
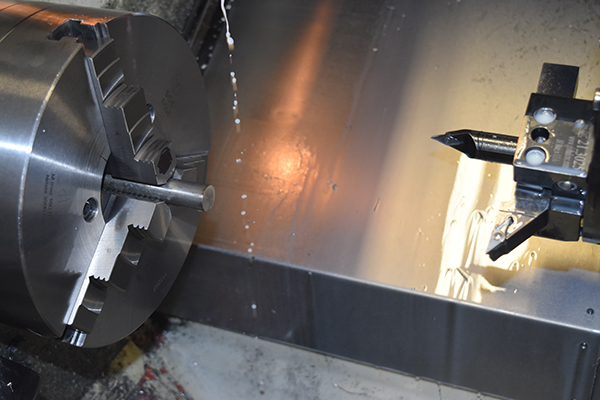
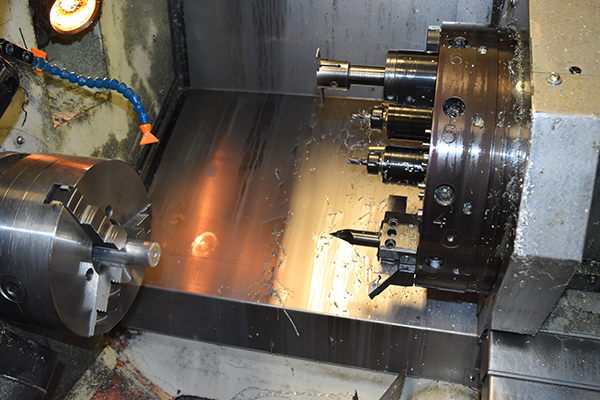
The last thing you want to do with turning is intermittent cutting since this increases the chance of chipping a tip. The first step is to cut the outside diameter to it's finished dimension. The cut length at 19mm, (16mm part, 2.5mm part off and 0.5mm spare). Since I will be using a part off with the push in tips it means that it will have a tendency to flex, so to combat this it must turn against a perfectly flat surface. The reason for turning an additional 0.5mm is because the 0.4mm tip radius will cause the part off to wander.
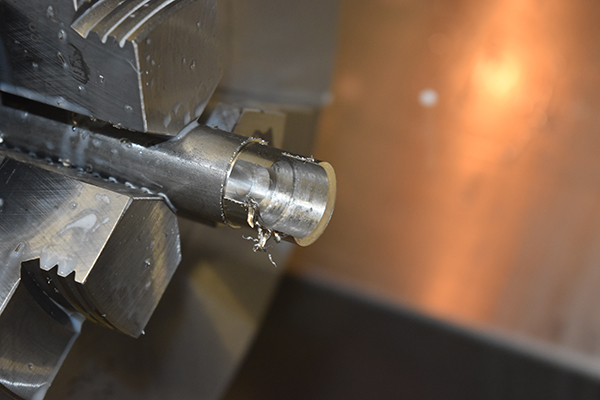
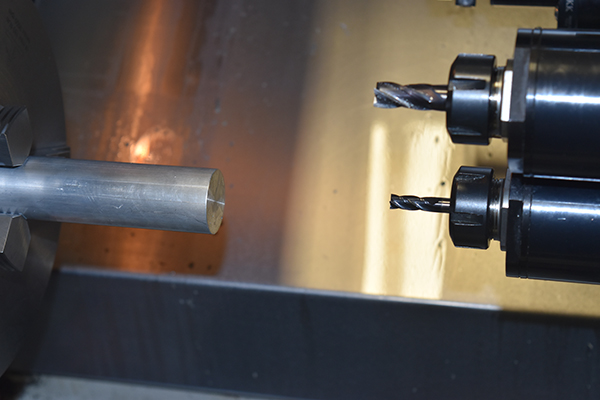
The next step is to cut the slot for the bolt shaft, this is awkward since the slot is 8.2mm and the cutter 8mm. Ideally an end mill cuts at the full depth using the full length of the flutes. The actual cutting depth is very shallow with a fast feed, and the point of contact on the cutter is to be very small. The point of contact on this cutter at full depth would be very large and the cutter would burn out very quickly. Shallow cuts had to be taken.
Another option would be to take shallow plunge cuts to the full depth, this again would be using a small portion of the cutter but it will have the greatest rigidity.
This is the ideal type of cut but in this scenario it would not work due to the large contact area.
This next slot can be cut using the full length of the milling cutter. A 0.5mm deep cut is taken every pass, this ensures a small contact area on the cutter and a longer cutter life.
The same.

After the final pass.
The same is done to rough out the hole for the hex profile to be cut.

The last pass.
The profile is then cut with the 3/16" milling cutter, this should be cut in two shallow passes since the contact area on the cutter is fairly large. Lastly it is parted off, intermittent cutting is pretty horrible on tips and I should not be using push-in inserts as these could vibrate loose.
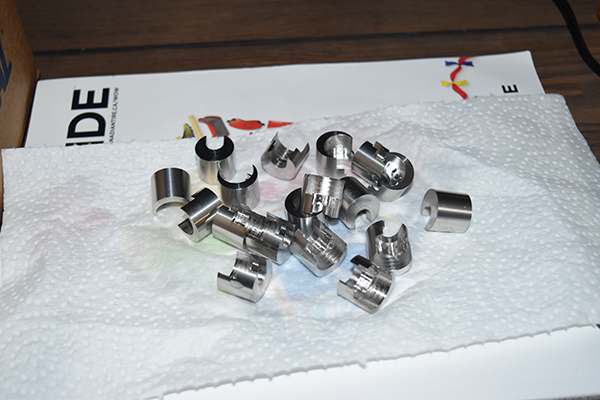
Result
They were a piece of cake to make, the only issue was the programming as I had to do it manually, it was tedious.
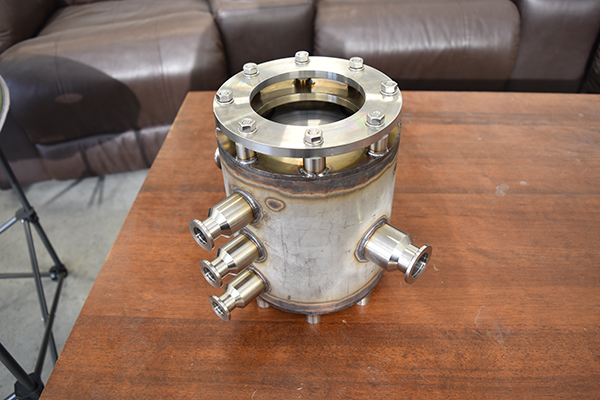
Here shows the clamps TIG welded in place.
More Clamps
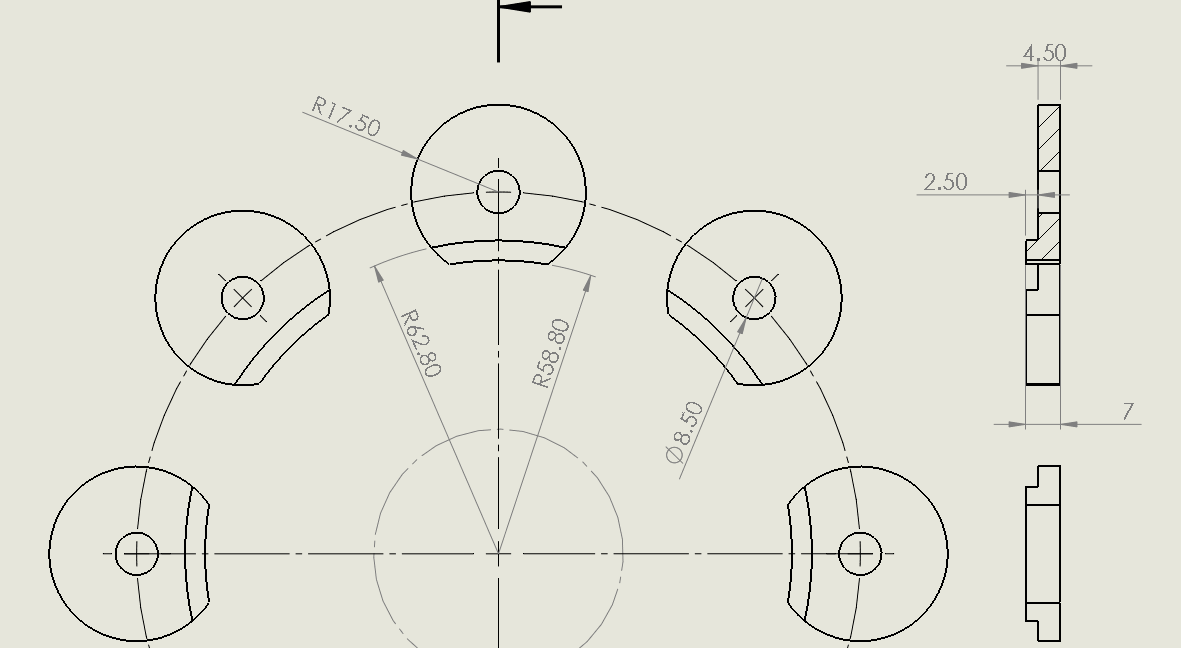
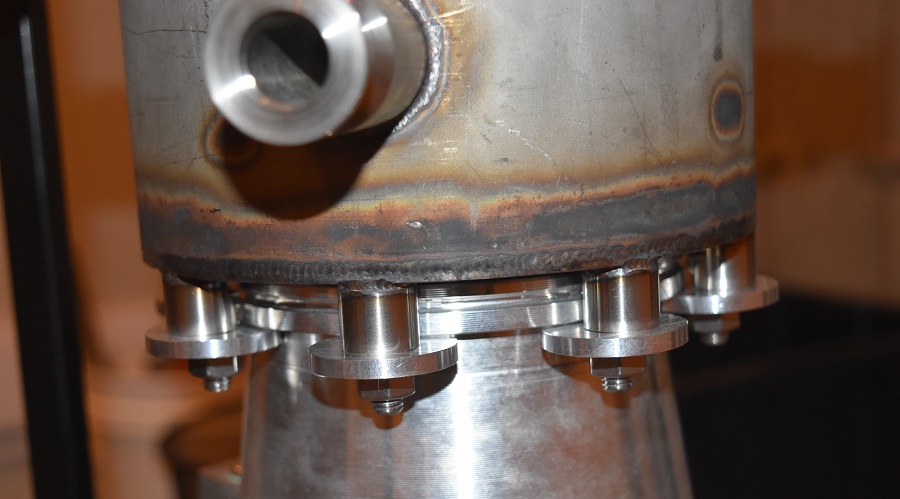
The turbo molecular pump I have for my nuclear fusor has a flange known as an ISO100 K-type. In simple terms it has a bore of 100mm and requires clamps to hold it together. Here below shows how my clamps will work, I modeled them to be easily machined from bar stock.
Here is the drawing for the clamps, there are a total of eight which slot underneath the flange. It is sometimes better to include all of the parts to ensure that all the radii and dimensions are correct.
I didn't take many pictures of the process since I was rushing to get them done at the time, they were super easy to machine though.
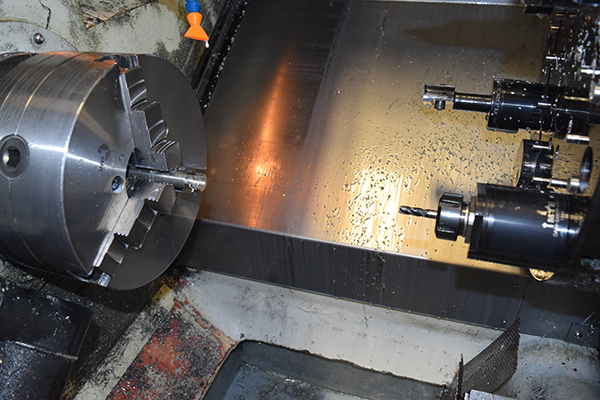
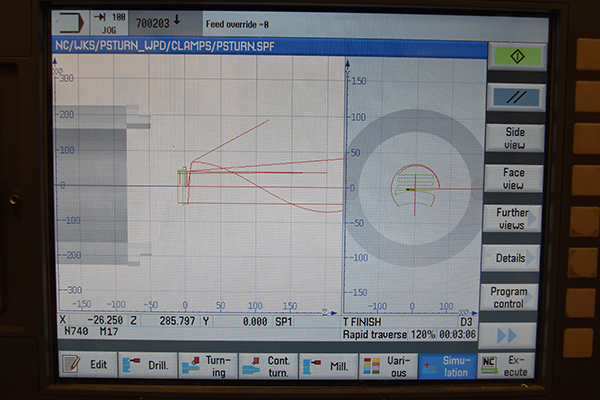
Here shows the simulation in the machine, I programmed these manually.

Here are the clamps doing what they are meant to do.
Overall these simple parts saved me a huge amount of money for the nuclear fusor project.
Hello, if you have enjoyed reading this project, have taken an interest in another or want me to progress one further then please consider donating or even sponsoring a small amount every month, for more information on why you may like to help me out then follow the sponsor link to the left. Otherwise you can donate any amount with the link below, thank you!